Create Application Load Balancer (ALB)
Create an Application Load Balancer (ALB)
ℹ️ Objective
- The Application Load Balancer (ALB) acts as the single point of contact for clients and distributes incoming application traffic to the backend servers.
- By placing the ALB in Public Subnets across multiple Availability Zones (AZs), we ensure the application has High Availability. If one AZ experiences an issue, the ALB will automatically redirect traffic to the servers in the remaining AZ.
- The ALB will listen for incoming requests and forward them to the Target Group (
copia-target-group) that we created in the previous step.
🔒 Steps to Follow
1. Start Creating the Load Balancer
- From the EC2 Dashboard, on the left menu, scroll down to the Load Balancing section and select Load Balancers.
- Click on Create load balancer.
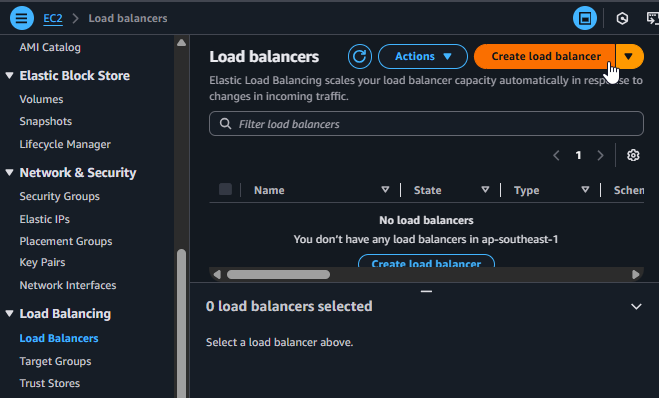
Start creating a Load Balancer
2. Choose the Load Balancer Type
- Since our application operates at the application layer (HTTP/HTTPS), select Application Load Balancer by clicking Create.
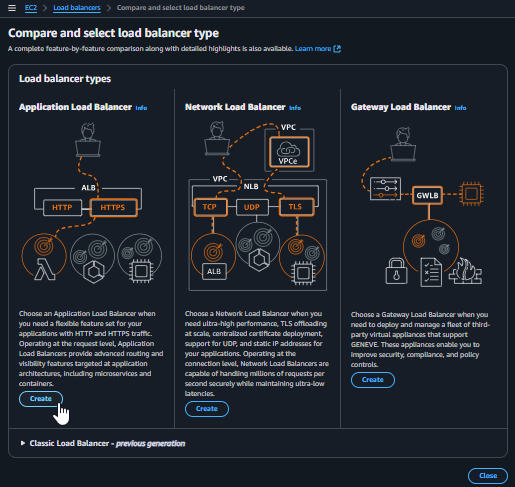
Choose Application Load Balancer
3. Configure Basic Information
- Load balancer name:
copia-alb - Scheme:
Internet-facing(Because this ALB will receive traffic directly from the Internet). - IP address type:
IPv4
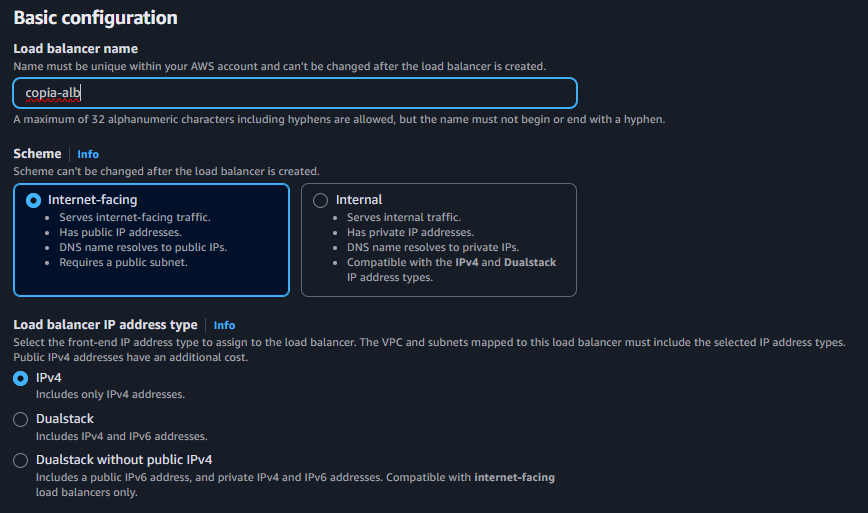
Enter basic configuration information for the ALB
4. Configure Network Mapping
- This is a crucial step to ensure the ALB operates across multiple AZs and is accessible from the Internet.
- VPC: Select
copia-vpc. - Mappings: Select both Availability Zones that we are using. For each AZ, choose the corresponding Public Subnet (e.g.,
subnet-public1forap-southeast-1aandsubnet-public2forap-southeast-1b).
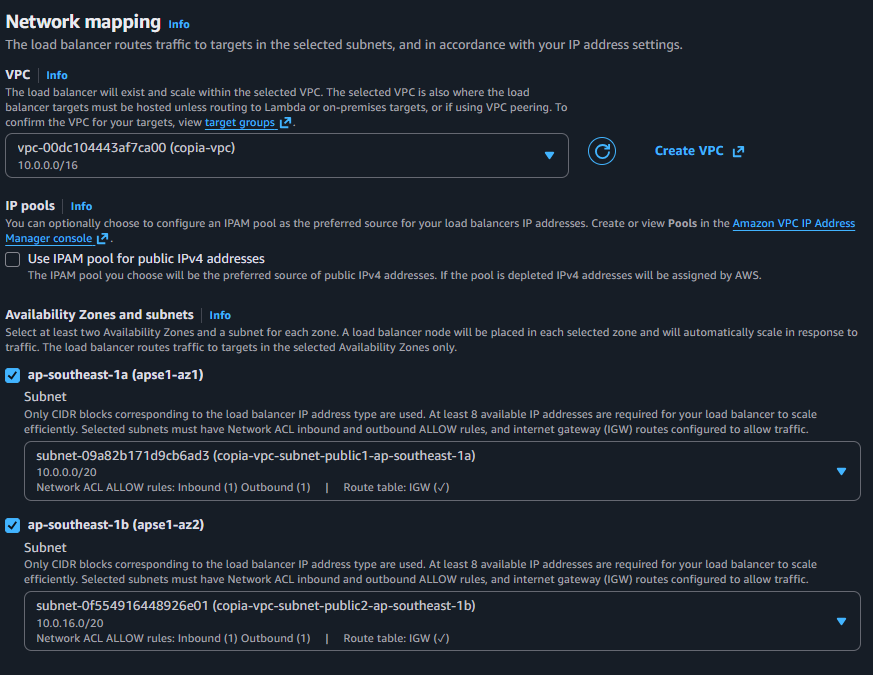
Select the VPC and Public Subnets across both AZs
5. Configure Security Group
- In the Security groups section, keep the
defaultSecurity Group selected. - From the dropdown list, select the Security Group created specifically for the Web Server:
copia-sg.
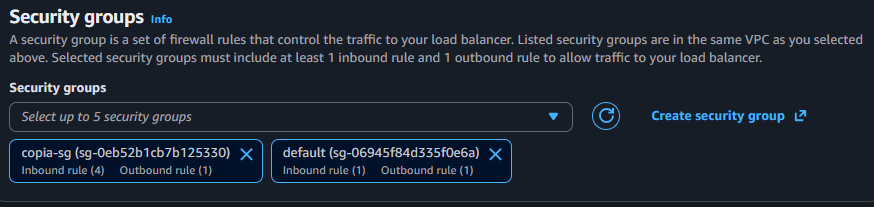
Select the copia-sg Security Group for the ALB
6. Configure Listeners and Routing
- This is where we define how the ALB handles incoming requests.
- Listener: Keep
HTTPand Port80as is. - Default action: From the dropdown list, select the
copia-target-groupcreated in the previous step. This action instructs the ALB to forward all traffic from port 80 to this Target Group.
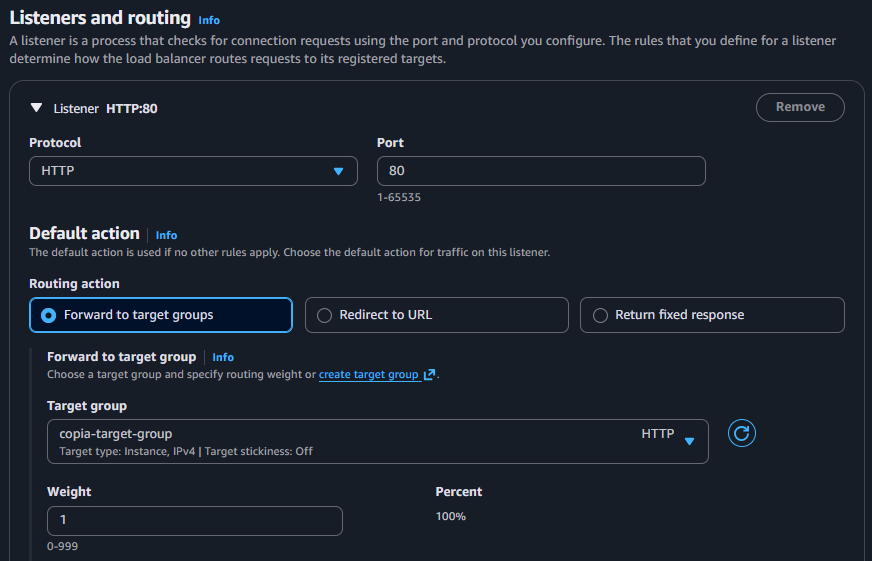
Configure the Listener and forward to the Target Group
7. Finalize, Check Status, and Test Access
- Review the information in the Summary section and click Create load balancer.
- After successful creation, click View load balancer.
Note: The process of provisioning a Load Balancer will take a few minutes. Its state will change from provisioning to active. Please be patient.
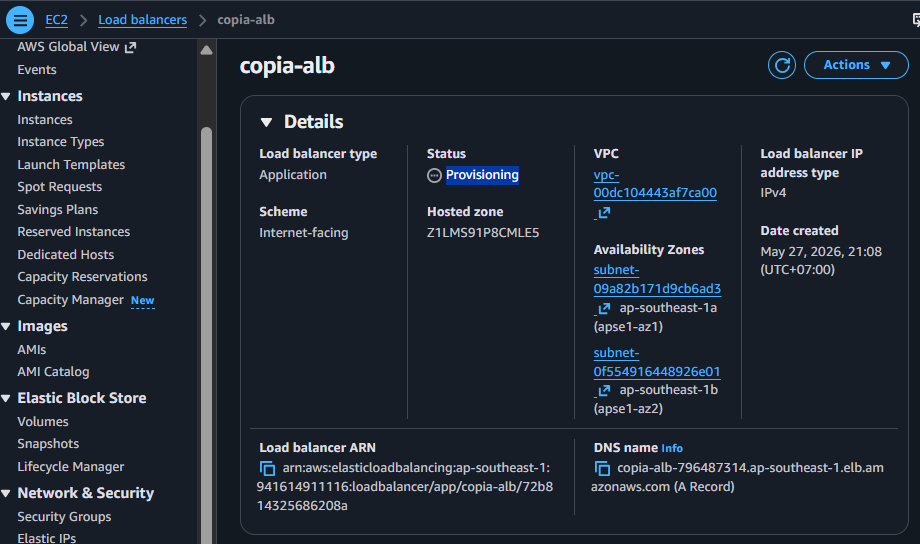
Wait for the ALB to become Active
- Once the ALB is
active, select it and copy the DNS name from the Details tab.
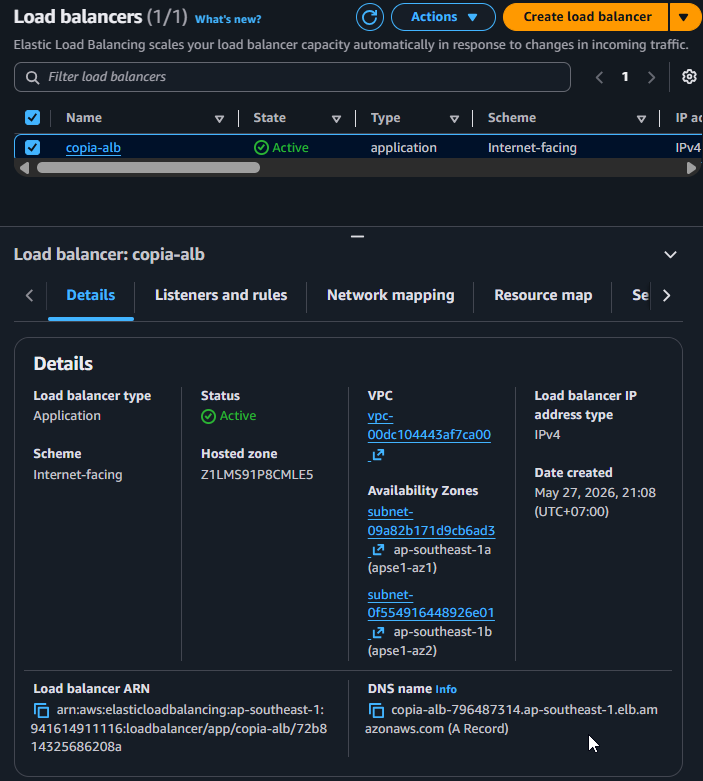
Copy the DNS name of the ALB
- After you connect to the Backend and upload the project, you will see the result of the next step.
- Paste this DNS name into your browser. If everything is configured correctly and your backend application is running on the
copia-ec2instance, you will see the welcome message from the API:Welcome to Copia Backend API!