A Security Group acts as a virtual firewall at the instance level to control inbound and outbound traffic.
In this section, we will create 2 separate Security Groups for the two core components in our architecture:
Web Server (copia-sg): Receives traffic from users and allows administrators to connect.
Database (copia-db-sg): Only allows connections from the Web Server and administrators, ensuring absolute data security.
🔒 Steps to Follow
1. Create Security Group for the Web Server (copia-sg)
This is the security layer for the EC2 instances that will run the FastAPI backend application.
Step 1: Start creating a Security Group
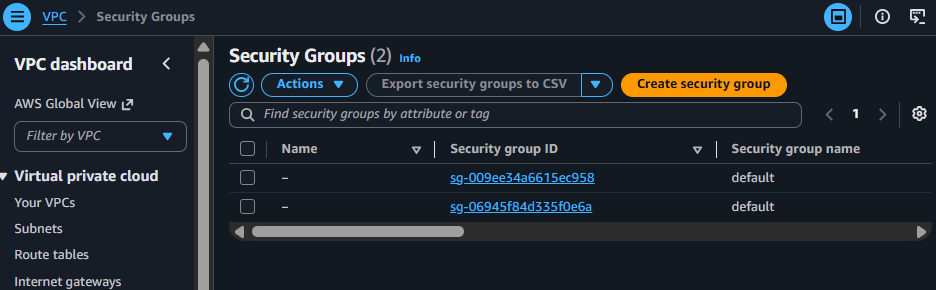
From the VPC Dashboard interface, select Security Groups from the left menu.
Click on Create security group.
Create a new Security Group
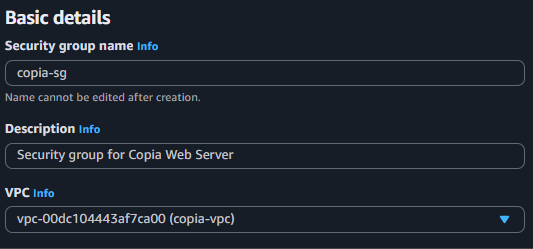
Step 2: Configure basic information
Security group name:copia-sg
Description:Security group for Copia Web Server
VPC: Select the copia-vpc VPC created in the previous step.
Basic information for the Web Server SG
Step 3: Set up Inbound Rules
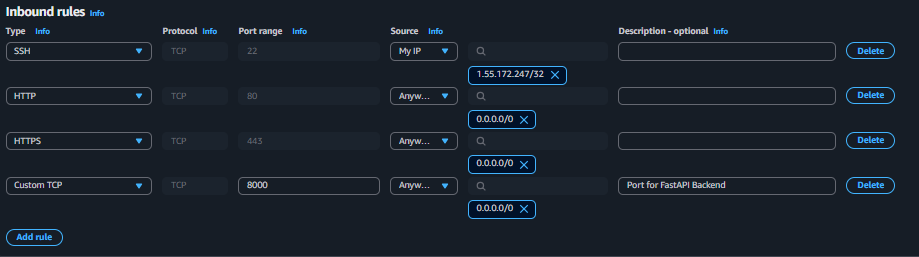
In the Inbound rules section, click Add rule and configure the following 4 rules:
Type
Protocol
Port range
Source
Description
SSH
TCP
22
My IP
Allows you to connect via SSH from your current IP to manage the server.
HTTP
TCP
80
Anywhere-IPv4
Allows users to access the web server via HTTP.
HTTPS
TCP
443
Anywhere-IPv4
Allows users to access securely via HTTPS.
Custom TCP
TCP
8000
Anywhere-IPv4
Opens the port for the FastAPI application (for testing and load balancing).
Configure Inbound Rules for the Web Server SG
When selecting My IP as the Source, AWS will automatically fill in your public IP address. This enhances security by only allowing administrators to access from a trusted location.
Step 4: Scroll to the bottom and click Create security group.
2. Create Security Group for the Database (copia-db-sg)
This security layer is designed to “lock down” the database, allowing only absolutely necessary connections.
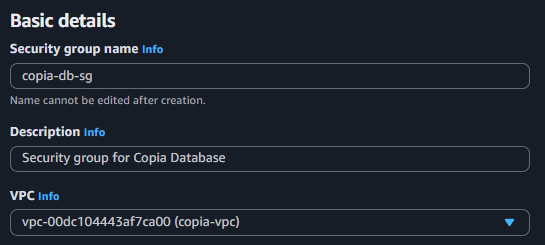
Step 1: Configure basic information
Click Create security group again.
Security group name:copia-db-sg
Description:Security group for Copia Database
VPC: Select the copia-vpc VPC.
Basic information for the Database SG
Step 2: Set up Inbound Rules
Click Add rule and configure the following 2 rules:
Type
Protocol
Port range
Source
Description
PostgreSQL/Aurora
TCP
5432
Custom -> copia-sg
Important: Only allows web servers (belonging to copia-sg) to connect to the DB.
PostgreSQL/Aurora
TCP
5432
My IP
Allows you to connect to the DB from your personal machine for management (e.g., using PostgreSQL Workbench).
Important Security Principle: By selecting another Security Group (copia-sg) as the Source, we create a dynamic rule. Any server belonging to copia-sg can connect to the database without needing to specify a particular IP address. This is the best practice for security in a cloud environment.
Configure Inbound Rules for the Database SG
Step 3: Click Create security group.
After completion, you will have 2 correctly configured Security Groups ready to protect your project’s resources.