Create CloudFront for Frontend (S3)
Create a CloudFront Distribution for the Frontend (S3)
ℹ️ Objective
- Create a second CloudFront Distribution, this time specifically for serving the static frontend files from the S3 bucket.
- Speed up page load times: CloudFront will cache the frontend files (HTML, CSS, JS, images) at its global Edge Locations, allowing users everywhere to access the website with the lowest possible latency.
- Enhance security: We will serve the website securely over HTTPS and restrict direct public requests to the S3 bucket, ensuring that all users must go through CloudFront to view your website.
🔒 Steps to Follow
1. Start Creating the Distribution
- In the AWS Management Console, return to the CloudFront service.
- Click on Create distribution.
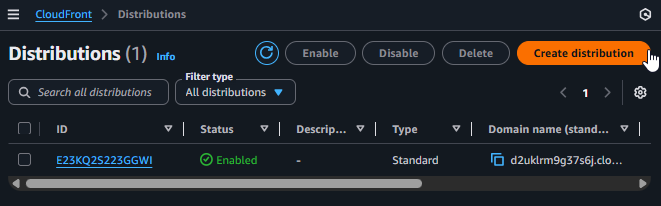
Start creating a new CloudFront Distribution
2. Choose Plan
- Choose the Free Plan to create a basic distribution without upfront costs.
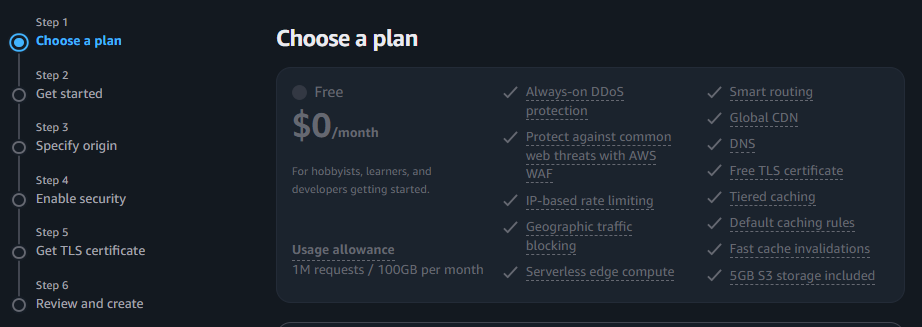
Choose the Free Plan
3. Name the Distribution
- Name:
copia-s3 - Description:
copia-s3
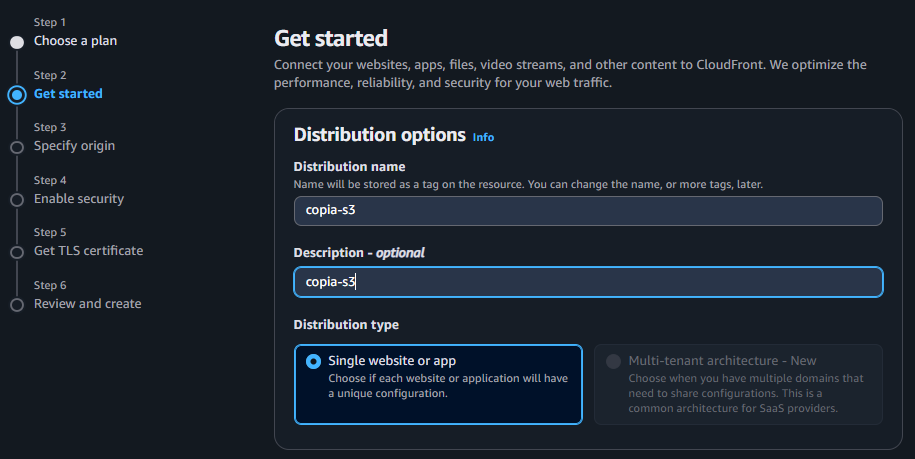
Name the distribution and set description to copia-s3
4. Specify Origin
- Origin type: Select Amazon S3.
- S3 bucket selection: Click Browse S3 and select the bucket you created for hosting the frontend (
copia-fe).
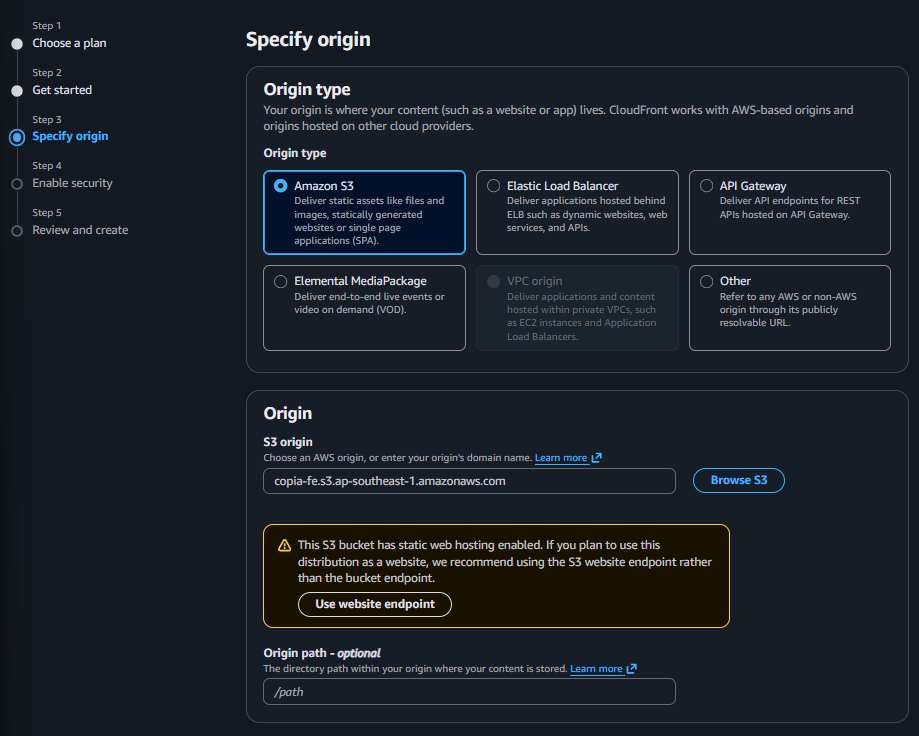
Specify S3 bucket origin
5. Enable Security (Web Application Firewall - WAF)
- Leave the settings at their default values (keep the default “Enable security protections”).
- Basic WAF protection is recommended to protect your static site from common web threats.
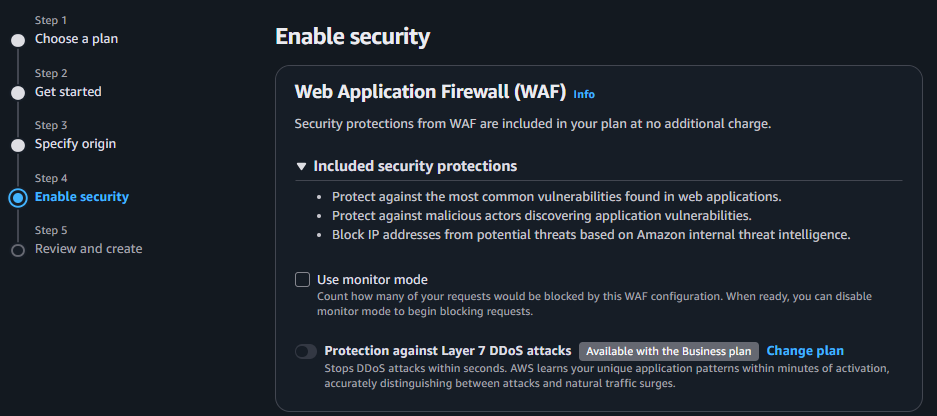
Keep the default security settings
6. Review and Create
- Review all settings, scroll to the bottom, and click Create distribution.
- The deployment process will take a few minutes. Please wait until the status changes from
Deployingto showing a last modified date.
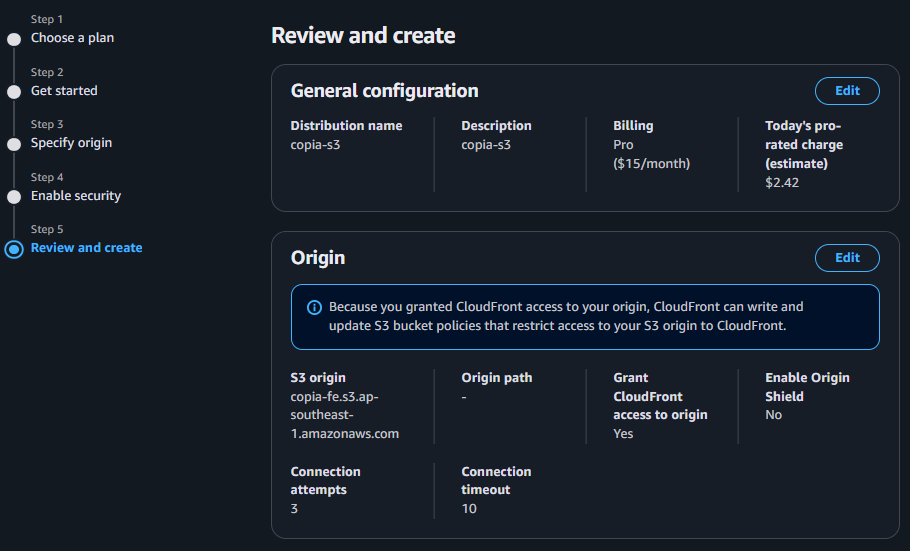
Wait for CloudFront to finish deploying
7. Configure Origins (Origins Tab)
- Once the distribution is created, click on its ID to open the details.
- Switch to the Origins tab.
- Here you can verify that the origin has been successfully created and points to the S3 bucket
copia-fe.
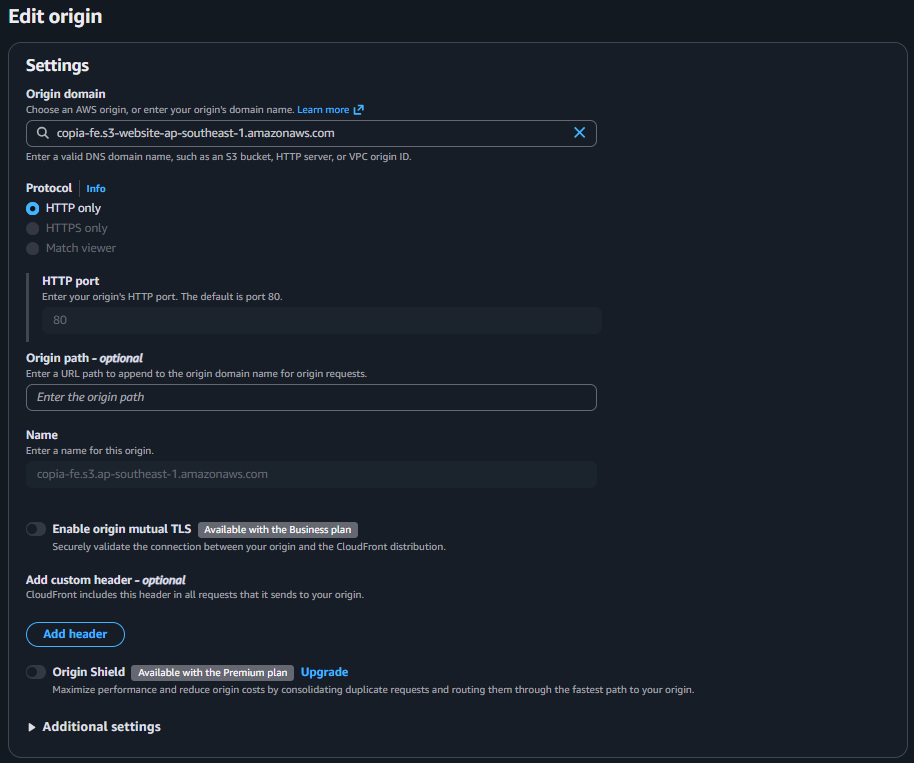
Verify S3 Origin in the Origins tab
8. Configure Behaviors (Behaviors Tab)
- Switch to the Behaviors tab.
- Select the default behavior
Default (*)and click Edit. - Verify that caching is configured correctly (unlike the backend, we want caching enabled for static frontend assets to optimize loading performance).
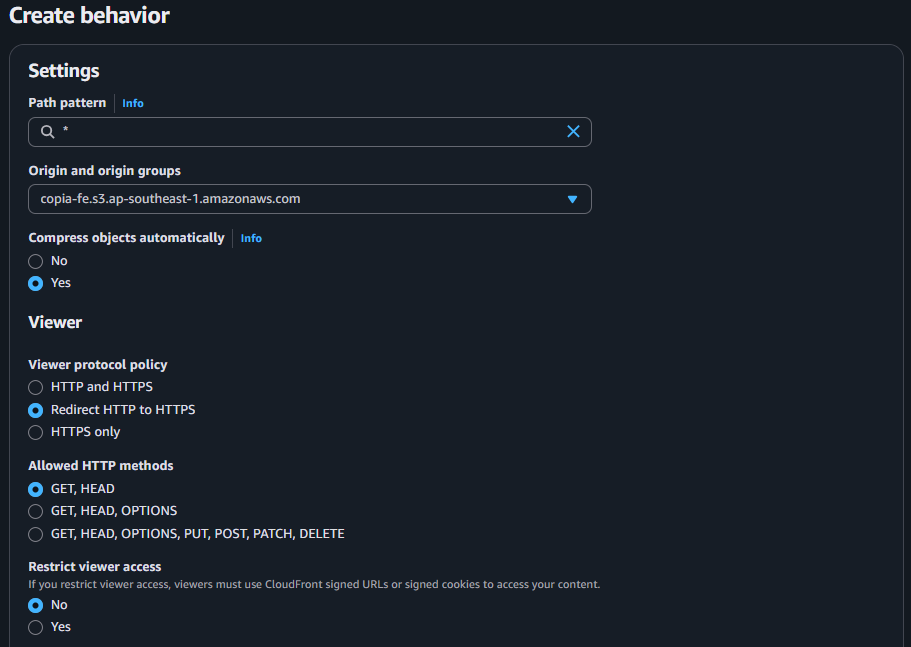
Verify Caching Behavior in the Behaviors tab
9. Update S3 Bucket Policy
- Because the S3 bucket block public access was disabled, we must configure a Bucket Policy to explicitly allow CloudFront to read objects.
- Navigate to your S3 bucket
copia-fe> Permissions tab > Bucket policy > click Edit. - Paste the following JSON policy (make sure to replace
copia-fewith your actual bucket name) and click Save changes:{ "Version": "2012-10-17", "Statement": [ { "Sid": "PublicReadGetObject", "Effect": "Allow", "Principal": "*", "Action": "s3:GetObject", "Resource": "arn:aws:s3:::copia-fe/*" } ] }
10. Configure Custom Error Responses (Required for React Router)
- Because React uses client-side routing, accessing URLs directly (e.g.
/login) will cause S3 to return a 403 or 404 error. We must configure CloudFront to redirect these errors back to/index.htmlwith a 200 OK status. - Go to your CloudFront distribution details page.
- Switch to the Error pages tab and click Create custom error response.
- Create 2 rules with the following parameters:
- Rule 1:
- HTTP error code:
403: Forbidden - Customize error response: Select
Yes - Response page path:
/index.html - HTTP Response code:
200: OK
- HTTP error code:
- Rule 2:
- HTTP error code:
404: Not Found - Customize error response: Select
Yes - Response page path:
/index.html - HTTP Response code:
200: OK
- HTTP error code:
- Rule 1:
- Click Create for each rule.
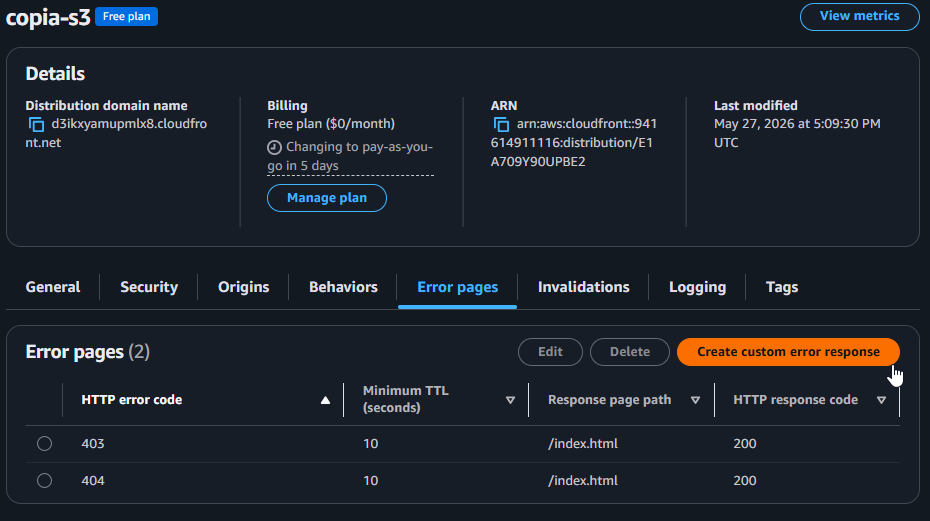
Configure Custom Error Responses in CloudFront
11. Finalize and Test
- Once CloudFront has finished applying the changes, copy the Distribution domain name value (e.g.,
d12345abcdef.cloudfront.net).
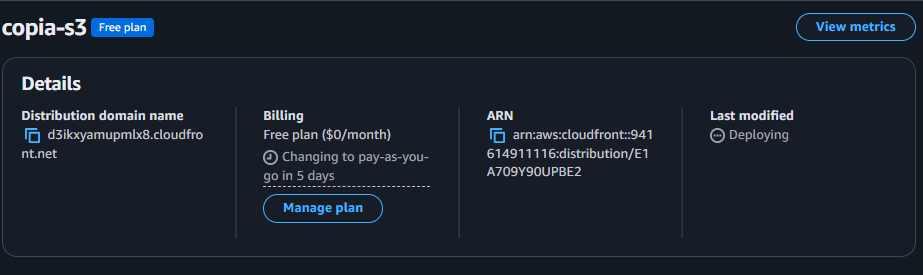
Copy the Domain Name of the Frontend Distribution
- Paste this domain name into your browser. You will see your frontend application load successfully, quickly, and securely through the CloudFront network, and navigating subpages will work flawlessly!